


 Tired of dull and worn-out wood floors? Revive the beauty and integrity of your wooden flooring with our comprehensive step-by-step guide. Whether you’re dealing with scratch marks, dullness, or discoloration, this article will provide you with expert tips and tricks to bring your wood floors back to life.
We understand the importance of maintaining the natural beauty and charm of wooden flooring. That’s why our guide is designed to cater to both beginners and seasoned DIY enthusiasts, offering easy-to-follow instructions and professional advice.
From preparing the surface and choosing the right products to sanding, staining, and finishing, we’ve got you covered at every stage of the restoration process. Our tried-and-true methods will ensure that your wood floors regain their original luster and appeal.
Don’t settle for less when it comes to your wood floors. Take the necessary steps to restore their beauty and transform your space into a haven of elegance and warmth. Follow our guide and give your wood floors the love and attention they deserve.
Assessing the Condition of Your Wood Floors
Before diving into the restoration process, it’s essential to assess the current condition of your wood floors. This step will help you determine the level of restoration required and identify any specific issues that need attention.
Start by inspecting the surface for scratches, dents, or discoloration. Take note of any areas that need repairs or extra care. It’s also important to check for any signs of water damage, such as warping or mold growth. Understanding the condition of your wood floors will help you plan the restoration process effectively.
Next, consider the type of wood used for your flooring. Different wood species may require specific treatment methods and products. Research the characteristics of your wood floors to ensure you choose the appropriate restoration techniques.
Lastly, evaluate the overall integrity of your wood floors. Pay attention to any loose or squeaky boards, as these may require additional attention during the restoration process. By thoroughly assessing the condition of your wood floors, you’ll be better equipped to proceed with the restoration.
Preparing Your Wood Floors for Restoration
Once you’ve assessed the condition of your wood floors, it’s time to prepare them for restoration. Proper preparation is crucial for achieving optimal results and ensuring the longevity of your newly restored wood floors.
Start by clearing the room of any furniture or obstacles. This will give you ample space to work and prevent any damage to your belongings. Next, thoroughly clean the wood floors to remove any dirt, dust, or debris. Use a broom or vacuum cleaner to get rid of loose particles, and follow up with a damp mop for a deeper clean.
After cleaning, it’s important to thoroughly dry the wood floors before proceeding. Moisture can interfere with the restoration process and affect the results. Use fans or open windows to facilitate drying, and check the moisture levels with a moisture meter if necessary.
Lastly, protect the surrounding areas by covering baseboards, walls, and furniture with plastic or drop cloths. This will prevent any accidental damage from the restoration products and ensure a clean and professional finish.
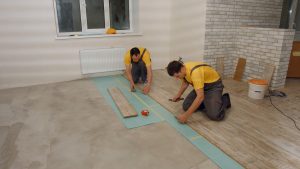
Cleaning and Sanding Your Wood Floors
With your wood floors prepared, it’s time to move on to the cleaning and sanding stage. Cleaning is essential for removing any stubborn stains or residues that may have accumulated over time.
Start by using a wood floor cleaner specifically designed for your type of wood. Follow the instructions on the product and use a mop or microfiber cloth to clean the surface thoroughly. Pay extra attention to high-traffic areas and any stubborn stains. For more stubborn stains, you may need to use a specialized stain remover or consult a professional.
Once the wood floors are clean and dry, it’s time to move on to sanding. Sanding is a crucial step in the restoration process as it helps remove surface imperfections and creates a smooth and even surface for staining and finishing.
Before starting, make sure to wear protective gear, including a dust mask and safety goggles. Use a drum sander or a handheld orbital sander to sand the entire surface of the wood floors. Start with a rough grit sandpaper to remove any deep scratches or stains, and gradually move to finer grits for a smoother finish.
Remember to sand with the grain of the wood to avoid creating any swirl marks or scratches. Take your time and be thorough in this step, as it will greatly impact the final result of your wood floor restoration.
Repairing Damaged Areas of Your Wood Floors
During the assessment stage, you may have identified areas of your wood floors that require repairs. Whether it’s a small scratch, a gouge, or a loose board, addressing these issues is crucial for achieving a seamless and professional-looking restoration.
For minor scratches and gouges, you can use wood filler or putty specifically designed for your type of wood. Apply the filler to the damaged area, following the manufacturer’s instructions, and smooth it out with a putty knife. Allow the filler to dry completely before sanding it down to match the surrounding floor.
In the case of loose or squeaky boards, you may need to secure them with screws or nails. Carefully lift the affected board and insert the screws or nails into the subfloor, making sure to avoid splitting the wood. Once secure, replace the board and ensure it sits flush with the surrounding flooring.
For more extensive repairs or if you’re unsure about tackling the task yourself, consider consulting a professional. They have the expertise and experience to handle complex repairs and ensure the best possible outcome for your wood floor restoration.
Staining and Finishing Your Wood Floors
After cleaning, sanding, and repairing your wood floors, it’s time to enhance their natural beauty with staining and finishing. Staining gives you the opportunity to customize the color and tone of your wood floors, while finishing provides protection and durability.
Before applying any stain, it’s important to test it on a small, inconspicuous area of your wood floors. This will help you determine the desired color and ensure compatibility with your wood species. Once you’re satisfied with the test results, you can proceed with staining.
Apply the stain using a brush or a rag, following the manufacturer’s instructions. Work in small sections, and remember to wipe off any excess stain to achieve an even and consistent color. Allow the stain to dry completely before moving on to the finishing stage.
When it comes to finishing, you have several options to choose from, including polyurethane, varnish, or wax. Each type of finish offers different levels of durability and sheen, so consider your specific needs and preferences.
Apply the finish using a clean brush or applicator, working in the direction of the wood grain. Follow the manufacturer’s instructions for the number of coats and drying times required. Allow the finish to cure completely before moving furniture back into the room or placing rugs on the wood floors.
Maintaining and Protecting Your Restored Wood Floors
Congratulations! You’ve successfully restored the beauty and integrity of your wood floors. To ensure their longevity and continued appeal, it’s important to implement proper maintenance and protection strategies.
Regularly sweep or vacuum your wood floors to remove dirt and debris that can scratch the surface. Use a damp mop or specialized wood floor cleaner for routine cleaning, avoiding excessive moisture that can damage the wood.
Place doormats at the entrances to your home to prevent dirt and grit from being tracked onto the wood floors. Use felt pads or furniture coasters under heavy furniture to prevent scratches and dents. Avoid wearing high heels or shoes with spiked heels that can cause significant damage to the wood surface.
Additionally, consider implementing a regular maintenance schedule, including periodic reapplication of finish or wax, as needed. This will help maintain the shine and protect the wood floors from wear and tear.
Common Mistakes to Avoid During Wood Floor Restoration
While the restoration process can be rewarding, it’s important to be aware of common mistakes that can hinder your progress or result in unsatisfactory outcomes. By avoiding these pitfalls, you can ensure the success of your wood floor restoration project.
One common mistake is rushing through the restoration process. Taking shortcuts or skipping important steps can compromise the final result. Take your time, follow the instructions carefully, and be patient throughout the entire restoration process.
Another mistake is using the wrong products or techniques for your specific type of wood. Different wood species require different treatments, so make sure to research and choose the appropriate products and methods. Using incompatible products or techniques can lead to discoloration, damage, or poor adhesion of the finish.
Finally, neglecting proper maintenance once the restoration is complete is a mistake that can undo all your hard work. Regularly clean and protect your wood floors to maintain their beauty and prolong their lifespan. Prevention is key when it comes to preserving the integrity of your newly restored wood floors.
Hiring a Professional for Wood Floor Restoration
While the step-by-step guide provided in this article is designed to empower homeowners to tackle wood floor restoration themselves, there are instances where hiring a professional is the best course of action.
If you’re dealing with extensive damage, intricate repairs, or if you simply don’t have the time or expertise to undertake the restoration process yourself, consulting a professional is a wise choice. They have the necessary tools, skills, and experience to handle even the most challenging wood floor restoration projects.
When hiring a professional, do your due diligence by researching and obtaining multiple quotes. Ask for references or examples of their previous work to ensure they have a proven track record. Communicate your expectations clearly and discuss any concerns or specific requirements you may have.
Conclusion: Enjoying the Beauty and Longevity of Your Newly Restored Wood Floors
By following this comprehensive step-by-step guide, you can restore the beauty and integrity of your wood floors and transform your living space into a haven of elegance and warmth. From assessing the condition of your wood floors to staining and finishing, each stage of the restoration process is crucial for achieving optimal results.
Remember to carefully assess the condition of your wood floors, prepare them thoroughly, and address any repairs or damage before proceeding with cleaning, sanding, and staining. Implement proper maintenance and protection strategies to ensure the longevity and continued appeal of your newly restored wood floors.
Whether you choose to embark on the restoration journey yourself or hire a professional, the effort and investment you put into restoring your wood floors will be well worth it. Enjoy the beauty and natural charm of your wood floors for years to come.
Comments are closed